Sunday, December 27, 2015

Unsolicited Advice about Homework

No one has asked, "Hey Emily, what do you think about homework?" But I'm going to tell you what I think anyway. I've worked for eighteen years in three different grade levels across three different schools in different communities, so I've gained some insight into what works and what doesn't.

My views on homework have been deepened by the experiences of my own children. We've suffered through some poorly designed assignments and ill-conceived packets, but we've also enjoyed carefully crafted homework. (Thanks for the great reading packets and extensions, Nicole!)

First of all, I don't have much patience with the homework/no homework dichotomy. I think that it distracts attention away from the real issue--what do you want kids to do, and why? Teachers need to think of the "work" of school holistically, not just as home and school assignments.

Too often, teachers just assign homework because it is expected, or because they didn't get through everything during class time. Some teachers even seem to think that completion of a chapter means that every problem has been completed, regardless of whether a student masters the concept on page 2 or page 102.

I sat down and made a flowchart to represent what I think about as I plan homework. Notice that I start with two different possible goals. Students can do homework to practice or review a concept, or to extend and deepen understanding. Each one of these goals brings up new questions to consider.


Sunday, December 20, 2015

Books for Students

I just love to get new books for the classroom to share with students. This fall, I've worked to expand my collection of graphic novels and ratchet up the difficulty level of my library to engage sixth grade readers. My sons are both comic book fans, so I spend lots of time in comic book shops browsing for new books.

Here are some of my favorites:

Roller Girl  by Victoria Jamieson
    I don't always have the opportunity to read with students during independent reading time. Too often I'm working on attendance, finding my papers for the day, or helping students write summaries for our weekly narrative homework. However, last week I just had to sit and finish Roller Girl while my students were reading. It didn't disappoint! If your students have loved Smile and Sisters, this book will be a perfect addition to the shelves.

The Graveyard Book Graphic Novels
by Neil Gaiman and P. Craig Russell
     Okay, this one isn't in the book orders. A student who has been devouring graphic novels asked for something "spooky" and "mysterious". I knew that The Graveyard Book would be just the thing, and luckily my fifth-grader son is awesome and sometimes shares books from his personal collection. Once I saw how much students liked this, I knew I had to get my own copies for the classroom.
    At first, I thought that the value of graphic novel adaptations of novels was to make compelling stories accessible to students who may not have the skill or patience required to read the novel form. But now I see that, when done well, graphic novel adaptations can add a new layer of richness to an already rich text. Even a reader who has already read or plans to read the novel version can enjoy and learn from the graphic novel form.

Space Dumplins by Craig Thompson
Whale diarrhea. In space. This is often enough to get readers to pick up Space Dumplins! I like it because it shows a different view of space life than many other books, and its bright, bold colors make it stand out from other graphic novels. Its a thicker book than many other graphic novels, which makes some readers nervous at first, but once they glance through the pages they see that they want to take on the challenge.

...and my students don't know it yet, but they are also getting copies of Hatchet as a gift before our holiday break! Here is a little poem that I wrote to accompany the gift:


As you get ready for the break (or maybe you are already on it, in which case I am a little jealous!), I hope that you take some time to read and relax as well. Have a wonderful holiday!

Saturday, December 5, 2015

Collecting and Analyzing Data in Science

The weird toys that grow when you put them in water make a great hands-on measurement activity. Here's how:

1. Get some growing objects! Here's a set from Oriental Trading that is WAY cheaper than the set that I purchased at a craft store. I got four holiday-themed items (penguin, snowman, Santa, tree), one per group in my classroom.

2. Introduce the students to the activity. I worked with small groups of students as the rest of the class did some volume measurement practice with this activity from Kate's Classroom Cafe. We discussed the activity and made some initial measurements, recording the length and mass of each item at the start of our activity.


Even though I know that the sixth graders have studied length and mass before, there were still some questions about how find the millimeters and how to record the length in centimeters with a decimal. This initial small group activity was the ideal way for me to figure out what kids can do and what I need to spend more time working on.

3. Submerge...

4. Record data day after day! You can make a data chart for students, or engage them in making their own. Because I knew that measurement was an issue, I had kids create their own charts with specific measurements. On some days, groups of students found the data; when time was an issue, I'd pull individual students to do the measurements for the class.

I love the Amazon Basics kitchen scale that I bought for the class this fall. The $12 price tag means I don't have to worry when kids take it to different places in the room or weigh sopping wet penguins on it.

5. Discuss the findings each day. I started the conversation with "What do you notice?" and encouraged the use of scientific vocabulary like increase, greater than, and less than. Kids noticed that the tree lagged behind the others in growth, while Santa stayed true to form (much to their amusement!) When students expressed doubt at the data, as with Santa's growth, I encouraged them to take the next step and do the measurements themselves.

6. Graph. This will be our big task next week. I'm going to have students figure out the intervals and build the graphs from scratch, which will take some time. However, it's definitely something that sixth graders should be able to do! (Plus they'll get to use the fancy markers, which they love.)

7. Analyze the data. The toys that I bought make an interesting claim: "Grow up to 300%". Stating whether this claim is accurate or not will be a great way to bring our work with measurement into the real world.

I've been excited to see this unfold in the classroom and watch as the students get better with measuring length and mass. It's added a fun dimension to the sometimes dry "Preparing for Science" unit.

News and Notes
As my own kids and I were talking about the gingerbread man during holiday decorating, I got an idea for a story. What were the ingredients that caused the gingerbread man to come to life? And could someone apply the scientific method to making their own living gingerbread? I took these ideas into a fantasy world that I've been playing around with and "Dancing Gingerbread" was born. 

Wednesday, November 11, 2015

Classroom Committees


This year, with my move to sixth grade, I've been having so much fun with classroom committees! They are a great way to engage kids in managing important classroom routines and processes. With committees, students take charge of various parts of the classroom.

What are committees?

A committee is a group of students focused on doing a job in the classroom. At the start of the year, my classroom had five committees: Library, Art, Science, Birthday, and Pencil. The library committee worked to organize our classroom library and set up book displays, the art committee made classroom art displays and contests, the science committee organized and displayed science materials, the birthday committee made a class birthday display, and the pencil committee organized classroom pencils.

In the second quarter, we changed committees, and I made a few changes. Students requested an organizing committee instead of a pencil committee, and the birthday committee had completed their task of creating a classroom birthday display. We added a wildlife committee instead, with the job of taking care of our fish tanks and filling the feeders.

It's neat to see how committees evolve and change. The library committee started the year with one process for signing out books, but refined the process over a course of weeks. The art committee ran an art contest in the first month of school, but has now changed their focus to work with maintaining and organizing art supplies.

When do committees meet?

We have regular committee meetings once each six-day cycle, on a day when I have my homeroom for an extended period of time due to the schedule. Students request committee meeting time! I also give committees new tasks when needed--for instance, today members of the science committee organized our graduated cylinders.

What happens when committees don't do their jobs?

This is what happens in real life, isn't it? Committees have trouble functioning, some groups don't follow through, and kids have disagreements. We work through it all! Sometimes I make quick decisions and act as arbiter, but more often I just listen and ask questions. Often in the answering of questions kids start to see solutions on their own.

Committees are a great way to engage students in the daily running of the classroom. How do they work in your classroom?

Tuesday, November 3, 2015

Compare and Contrast Writing

 
 Teaching students how to effectively write to compare and contrast is so important for teachers of all grade levels. Comparing is important for test-taking, but it's important for life, too. Readers of wildlife blogs want to know how cottonmouths are different from copperheads, foodies want to know the difference between cassia cinnamon and ceylon cinnamon, and teachers want to know how different basal series stack up against each other.

    Kids can get better at writing to compare and contrast very quickly, making it a great writing project for November and December. Here are some suggestions for getting started.


1. Start by comparing real objects
    Even older kids need concrete experiences! By starting with real objects, kids of all ability levels can learn how to systematically compare. Because last week was Halloween week, we used Hershey Hugs and Hershey Kisses, but you could compare anything that kids find interesting.
    As kids compare, focus on using language such as similarities and differences to move kids away from terms like sames and differents.

2. When you move to text, discuss: What to compare?

    Begin this conversation by talking about how students compared the real objects based on their physical characteristics. What could we compare in text? Be aware that what kids say (and don't say) in this discussion will reveal the gaping holes in your reading instruction. And that's okay, because you want to know about those gaps, right?
    Hopefully, students respond with these kinds of ideas: form (poem, narrative, article, etc), author's purpose, topic, central idea/theme, point of view, tone, word choice, and so forth. Students probably won't know the exact words for all of these, but will remember talking about them at some point in time.
    The big goal here is to make the shift from the physical world to the abstract world of talking about texts. If you don't hear at least a few of these abstract concepts, you may want to hold off on comparing texts and deal with this issue.

3. Use a graphic organizer
   I've used them all: Venn diagrams, double bubble maps, charts. The actual organizer is not as important as the thinking that kids put into it and the modeling that you show. Right now, we are using Thinking Maps again at my school (yay!), so I am working with those.
   You will notice that my students have used lots of color in making graphic organizer. My students are very visual thinkers this year and LOVE using different kinds of markers as they work.

4. Show clustered and alternated styles of writing, but emphasize alternating

   There are two distinct methods of compare and contrast: clustered, in which details about each item are clustered together, and alternating, in which the details alternate back and forth. I like to show students each version, but focus more on the alternating style. This is more difficult to write, but easier for the reader to understand. (You can find detailed examples in my Sea Turtles Expository Text Mini-Unit)
    I wrote about two of my favorite restaurants for my example. I recommend that you write your own little paragraph example--kids love to find out details about their teachers! In my example, I underlined details about Chipotle yellow and details about Montezuma's blue. Details that refer to both are green. (I wish I'd come up with it, but it was a kid's idea...he liked it so much that he created a similar color scheme for making his own double bubble map.)

5. Work with topic and concluding sentences
     Kids will look at the topic sentences that you model and alter them for their own writing. Variations of the topic sentence that I used in my Chipotle/Montezuma's paragraph has turned up again and again in student writing. Something about this sentence (even though I only showed it on one day of instruction) was compelling and memorable for students. This shows that they are still shaky on writing topic sentences for compare and contrast paragraphs.
    I'm not surprised that kids are struggling with topic sentences for compare and contrast paragraphs. Many adults struggle with this, too. Are we just writing for the sake of comparing, or is there a point to this comparison? If the writer doesn't know, the reader won't, either!
    In my Montezuma's/Chipotle paragraph, I created the idea of "choosing" between the two as a reason for the comparison. This can be effective and easy for kids to understand.

6. Give kids lists of transitions to use as they write
    Without access to strong transitions, students will revert to a "also/but" pattern. Having a list of transitions available to students challenges them to try phrases like "however" and "on the other hand". Creating this list is a good activity to try with students.

Tuesday, October 27, 2015

Meaningful Multiple Choice


Answering multiple choice questions doesn't have to be drudgery! In fact, multiple choice questions can have a place in an engaging ELA classroom. Getting kids to talk more about multiple choice questions helps them to move beyond "right/wrong" thinking and into looking more deeply at the text.


Reflect on the process of answering. Which questions were hardest? Easiest?
This is a great place to begin. I like to have students put a star beside the one that they think would be hardest, and a circle by the one that they think is easiest. Now here's the interesting part: Why? Listening to students talk about their choices reveals so much about their thinking.

Working in groups to answer questions
This works best with the really tough multiple choice questions, and when students feel comfortable with each other. As my students did this last week, I enjoyed circulating to listen in on conversations. In one group I heard a student timidly offer a (correct) answer, only to be overruled by the group. I called the student aside about a seemingly unrelated issue--and then I said, "You were right for #1! Why didn't you stand up for your answer?" It was neat to watch how the student returned to the group and re-started the conversation!

Some kids hated the questions in the item sampler, and it was easy to see why. Listening to them grumble good-naturedly about the wording of the questions was kind of fun for me.

Have students write their own multiple choice questions to reflect deep thinking about the text
The second part of this is the most important, because it is what provokes discussion. What is "deep thinking"? And how can we craft questions to reflect it?

In last week's groups, this led to some conversations about "tricky" versus "deep". The students were reading a version of Stone Soup from the PSSA Sixth Grade ELA Sampler. The man in the story asked the woman for several different food items. A question that presents lists of these items and asks students to choose the correct list would be tricky...but would it be deep? For kids, this was a satisfying and purposeful conversation as they grappled with where such an answer would be found. (Interestingly, the argument centered on how a reader would have to scan the text to find the information in question.)


Thursday, October 22, 2015

Summarizing Nonfiction...Again and Again and Again


It's been nine years since I wrote a book about summarizing, and I keep feeling like I learn more and more. This year, as I've moved back into sixth grade, I decided to start the year with frequent summarizing tasks. I'm teaching summarizing, but I feel like I'm the one who is learning lessons!

This year's summaries are based on a set of four expository texts about water. Each text has a similar structure and text features. My goal was to build on repeated experiences and frequent feedback to level up my students' summarizing skills.

Here are some of the things that I have learned (and re-learned!) so far this year.

Provide limited space for the summary
    Conscientious sixth graders want to do well! In many cases, this means that they write summaries that are almost as long as the original text. There are two different profiles for the writer of the long-winded summary. On the one hand, you'll see kids who are proficient readers and have a large working memory produce these summaries. They just have a big capacity for details, and they understand everything in the text. On the other hand, some kids who are struggling but conscientious will create these summaries. They're not sure of which details are most important, but they want to please the teacher and so they put them all in.
    My problem when I get these summaries? I'm too soft-hearted! These kids have obviously worked hard, and at the start of the year it's tough for me to hand them back for the kids to redo.
    When I provide limited space for the summary, though, I let the lines do the heavy lifting. "Make sure your summary fits in the space," I say, and when kids ask for extra paper, I give them a small sticky note.
    How much space should you provide? A good rule of thumb is to think about how much room it would take to write a sentence for each paragraph, and then add 3 or 4 more. This gives kids with big handwriting enough room to write a good summary without going overboard.

Teach students to chunk the summary process
    Some students look at the article and think, "I can never summarize that!" In many texts, though, kids can use the headings to guide them through. This is especially helpful for chunking a summarizing assignment for students with learning disabilities. "Don't worry about the whole thing today," I tell students. "Let's just do this first chunk."
    This also helps students who tend to summarize in a knowledge-telling fashion. These students write everything they remember about the text, in the order in which they remember it. A summary written like this tends to sound like a list of random facts instead of an organized summary. By reminding students to go back to the text, you can give them an anchor for their thoughts.

Beware the "about" summary

    Around about the third summary I start to see the topic-based summaries creeping in. Students are becoming more efficient with their summarizing and decide to take a shortcut.
    These are actually signs of good progress. Usually, I end up writing about twenty times: "Don't say what the article was about--actually include the information!" Once kids see the difference, they realize that the 'about' summary is quite empty of actual facts.

Look for growth over the long haul
    The development of summarizing skill is a long process. As readers grapple with more and more complex texts, they need to see how they can wrestle ideas to the page to write a summary. Students won't necessarily become strong summarizers after one lesson, or two, or even three. However, the good news is that repeated summarizing can build comprehension as well. I like to think of teaching summarizing as test-prep I can live with!


Sunday, September 20, 2015

Depth of Knowledge in Science

As I move from teaching fourth grade to teaching sixth grade, I've noticed a great deal of overlap between the two curriculums*. This is not necessarily a bad thing, as so many of the big concepts are really important. However, knowing what kids learned in fourth grade is leading me to try to delve more deeply in sixth.

In the first few weeks of school, I reorganized an existing activity to add more depth. Originally, the activity was a standard water cycle model. You can see them in the photo to the right. The original activity had students identify the evaporation and condensation going on in the model.

How could I ratchet up the thinking in this activity? I decided to explore the word model. What is a model in science, and what is the role of a model? Both our PA standards and the NGSS place an emphasis on the creation and analysis of models in science class. However, not many traditional curricular materials for elementary school engage students in exploring the worth of a model.

So then, after we made the models, we didn't stop at looking for examples of condensation and evidence of evaporation. Instead, I asked the students:

Is this a useful model of the water cycle? Why or why not?

Students referred back to the water cycle diagrams that we had made together and worked in groups to discuss. It was beautiful to observe! Best of all, there was wide disagreement. Most of the disagreement had to do with the way that we set up the models on the windowsill--the models that were closer to the window had much more condensation that the windows that did not.

Some other models had been bumped and had blue water droplets clinging to the sides. "When it evaporates, it should be clear, right?" one student asked. "So why is it blue?" This led to a discussion of a model that is so fragile that a slight bump can change the results. "If someone who didn't know about evaporation looked at it, they might think that the water evaporated blue!" a student said.

The task also required students to refer back to their resources about the water cycle. "Would there be transpiration in this model?" one student asked her group. "There wouldn't, right? Because there are no plants." In another group, peers corrected a student's misconception about groundwater. "The water on the bottom is the groundwater because it's on the ground," she said. Group members went back to the diagram to talk about why they thought the water represented surface water instead.

The writing prompt was a straightforward introduction to science argumentation, as I provided students with a claim that they could use as their topic sentence. Some students wanted to write more than a paragraph, while others stuck with a simple explanation. This will give me great information about where they are with science writing so that I can plan instruction from this point.

For a busy teacher, re-making existing activities to involve deeper levels of thinking is a great way to build from an existing curriculum. What activities have you improved upon?

You can find the writing prompt and activity in Watersheds, Wetlands, and Water Resources: Texts and Activities over at TpT.


*I like "curriculums" instead of "curricula" because I think it's fussy to apply Latin-based rules to modern words. It's an acceptable plural here.

Saturday, September 12, 2015

Flipping Lessons with Frolyc

In the early weeks of the school year, I admit to loving the computer lab. Not only is it equipped with great Macbooks for student use, but it is also air-conditioned! The cool air is a welcome respite from the heat and humidity of August and September.

Last week, I experimented with flipping a lesson. Instead of me standing up and teaching all students at once, I wanted to give them the flexibility to move through a lesson at their own pace. While they worked in the cool comfort of the computer lab, I could work one-on-one with students to complete our beginning of the year assessments.

Frolyc is the perfect tool for creating a flipped lesson. I can put all of the text, videos, and activities that I want students to use in one easy place. Even though my students don't all have computers at home, they still need to learn how to work through online content and learn from these kinds of lessons.

I started out by creating my classrooms. No need for student e-mail addresses or lengthy forms--I just had to type in student first names. Each student receives an individual code that they use to access their activities.

Next, I created my lesson through the authoring tool on Frolyc. We are working on story elements with a focus on protagonist, antagonist, and parts of a plot. I used a "Multimedia Text" activity to combine an image, a video from YouTube, and text. This is what it looked like on student computers:


I couldn't find a great video for parts of the plot diagram, so I adapted a few slides from a PowerPoint that I have already made (Story Elements) and did a screencast using QuickTime. Then I posted it to YouTube so that I could embed it in the next page of the Frolyc activity. (link to video)

The kids found it very amusing to listen to me! Even better, though, they had full control of stopping and starting the video. "Can we watch it again? I don't really remember all of the words," one student said. "Of course!" I replied. This is one advantage of a video!


After the video, students read a story, and then answered sequencing and multiple choice questions. These questions required students to apply the vocabulary that they had learned in previous pages. Some kids realized that they had to go back and reread, which was a great lesson for them.


 The lesson ended with a drawing activity. Kids enjoyed interacting with the drawing tool, and I loved watching the collaboration bloom--"How do you add a text box?"--and "How do I draw instead of erasing?"


I'm planning to continue creating flipped lessons for students in the weeks to come. These lessons are great for introducing vocabulary and helping students to experience content.

You can find the full activity here if you would like to try it out with your students.

If you would like to try to create your own flipped lesson, here is a story that you can use--for free! This retelling of "Stone Soup", told from multiple points of view, can be used for teaching about theme and point of view.

Sunday, September 6, 2015

Using Real Data in the Classroom

I love teaching sixth grade! It is so wonderful to have the same students that I taught in fourth. The first few days of school had a totally different feel--I knew the kids, they knew me, so we could get to the fun stuff really fast.

Science has been especially fun. I wanted to get right into the learning. The more years I teach, the more frustrated I am by "Preparing for Science" units. I feel like we spend time naming the tools that we could spend USING the tools!

Instead, we jumped right into the real process skills and real science. I have pages and pages of data from our bird feeder observations of the last few years. Fourth graders liked to keep the data, but never worked much with analyzing it.

There are two kinds of lesson planning to me. One kind is the clear, cut-and-dried lesson planning of curriculum designers: Teacher will do x, students will do y, a known quantity of learning will ensue.

But my favorite kind of lesson planning is the fuzzy lesson planning. It's "fuzzy" not because of a lack of teacher preparation, but because of the multitude of possibility in student responses. I can't picture exactly how the lesson will turn out, but I bring all of my knowledge and experience in the lesson to bear.

First steps: Looking at data
As students entered class on the first day of science, I let them sit where they like. After some quick introductions I handed out the data and gave directions. Papers flew about as kids looked at the numbers. I walked around to listen (and to show bird pictures as requested.)

Kids wasted no time in looking at the observations, which was great to see. Because they had chosen their groups, I could make some social observations of my own, always good to start with at the beginning of the year!

Organizing the data
After they looked at the basics, students had to come up with a way to organize the data. This is a way that fourth graders and sixth graders are so different: The sixth graders jumped right into making tally charts.

But what were they tallying? Data sheets included dates, kinds of birds, weather, student name, and behavior notes. What kinds of information would students tally? Luckily, it varied across the classes--just what I wanted to see! Many groups tried to find a link between weather and bird types seen. Some went for the simple "Number of birds seen"--a safe and productive choice. One group tallied data related to the student-observers, making a list of all of the students who had recorded observations and tallying how many times each name appeared.

Knowing what to tally, and realizing that there are multiple possibilities, is a huge science process skill. And yet it is one that is never explored during those "Preparing for Science" units. The cooperation that I observed was also fascinating. Students figured out that they needed to keep track of which papers they had tallied, and which they hadn't--and they also figured out ways to split up the workload to keep everyone engaged. Again, these aren't skills that usually show up in traditional science units!

Displaying Data
I told students that they could have access to any paper in the classroom to display their data. This got them up and moving and looking around for supplies! I loved watching how some groups used graph paper and others used construction paper. Some groups looked for rulers to make straight lines.

I helped a few groups to create graphs using the NCES Create a Graph site. This site is one of the best for science instruction--instant graphs! Kids still have to do lots of thinking, though, and they worked together to create titles, figure out what to put on the x-axis and the y-axis, and work through the numbers.

The question of incomplete data came up frequently. There were a lot of bird observation pages that just weren't finished--it was time for recess, we were leaving the room, etc. (Several of the unfinished pages were mine. Oops!) What is the effect of incomplete data? Kids were passionate as they complained about how "annoying" it was to see so many pages that didn't have everything filled out. I only hope that they remember this annoyance when they have data charts to complete this year!

There was also the question of overlapping data. On the observation sheet, a recorder could check off weather conditions like "warm", "frigid", "cloudy", "cool", "sunny", and so forth. But some of these weather conditions could overlap--a day can be warm and cloudy, or frigid and sunny. The students who tried to link weather conditions to kinds of birds seen found this overlap frustrating and it really kept them from seeing clear patterns.

Questions to Consider

This fuzzy lesson revealed a great deal to me about the students, and helped my plans for the upcoming year to come into focus. They showed some great cooperation working in groups, which reinforces my instinct to build in as many collaborative activities as possible.

Once data is displayed, there will be more opportunities for questioning and learning. Each group had a different set of bird observations with the dates marked. None of the groups noticed that the dates were significant for the kinds of birds seen, as they didn't compare information across groups. (For example, juncos are heavily represented in the January/February data, but not at all in September.)

Once all of the charts are displayed in the hall, will kids notice this? Will they see that different groups came up with different information, and wonder why? What will I do if this happens? What will I do if this doesn't?

Next Steps
I really hope that students will be able to come up with a new data collection tool. What learning can they take from this lesson to apply to future data collection? I've added a digital thermometer to the window...hopefully someone will pick up on this hint that we have to record the exact temperature!

I was glad that I did this lesson, because it helped me to learn more about my students. A fuzzy lesson can be daunting to undertake, but the rewards can be far greater than any worksheet.


Wednesday, August 19, 2015

A Classroom for Reading

I've been busy setting up my new classroom! Here are some of the things that I've learned and noticed through the process.

First, I jumped off the cute train. Teaching fourth grade for the last few years, I felt pressure to make a gorgeous and cute classroom that exemplified a theme. This year--I decided to free myself from this pressure.

Instead, I put my energy into organizing books.


I sorted all of my books and downsized quite a bit. (I gave my Horrible Harry and Fangbone books to my husband, who teaches third grade...his students will love them!) Because I've taught most of my incoming students before, I know what they like, and I wanted to have a classroom library that would impress them and be new and different at the same time.


This is the group that loved Amulet a few years ago, so I made sure to have lots of graphic novels on display. But I also want to show them more, so I pulled all of the Percy Jackson books from the shelves at home, as well as books by Andrew Clements, Gordon Korman, and Pseudonymous Bosch. I've also added a bin for Nathan Hale's Hazardous Tales, Bunnicula books, and the I Survived Series.


I love my large display for featured books. The collection here is somewhat random--I've put together the books that I bought over the summer. (Can you see that some of the covers are already curling? I hate the humidity!) I'm excited to share Countdown and Mister Max with students this year!


As you can see in this picture, the library is at the front of the room, so it gets everyone's attention as they walk in. I don't have fancy seating in the library area for several reasons. One, it always seems awkward to me to have kids sitting in a place where others are browsing. Two, I needed more space for a large science area and makerspace (more about that later!)

My room is pretty basic, otherwise--and I really like it! After all, right outside my windows I have a gorgeous green bank, filled with milkweed, honeysuckle, and tulip poplar saplings. What glossy die-cut figures could compete with that?


Just today my sons found a monarch caterpillar and a milkweed tussock caterpillar right outside. Once school starts, I'm going to put up birdfeeders to see what else we can entice!


When I stepped away from the cuteness arms race and really thought about the classroom, I could spend more energy on the tasks that really matter. Now I have lots of empty space on the walls for the anchor charts, artwork, and displays that students create.

Students aren't coming into a museum room, but a workspace that they can impact and change. What better way to start the year?

Sunday, August 2, 2015

Reading Homework: Packets by Month

At around the same time that I was working on a spelling program, I also wanted to create some reading homework packets. I wanted reading homework that would give us:

  • Shared texts
  • Student choice
  • Comprehension questions
  • Vocabulary-building activities

Over the course of three years I created monthly packets of reading homework. Each packet includes texts with vocabulary words, comprehension questions, and other activities. A cover sheet explains the week's assignments in a clear, parent-friendly way, and answer keys are included in the teaching guides.

Even if you are not looking for homework, you can use these texts in other ways. Here is a month-by-month look at the texts.

September

Ah, September...a month of getting used to new routines, new classmates, a new year! This month's homework packets introduce the routine and review different kinds of texts. Each text includes comprehension questions, vocabulary practice, and a vocabulary quiz.

The Great Bear: Legend of the Fall Sky: This short text includes a retelling of the story of the Great Bear. Kids love learning about constellations and sharing their summer stories!

The Green Darner: This informational text tells about a migratory dragonfly, the green darner, in question-and-answer format.

Caramel Apple Float: A kid-favorite, this procedural text tells how to make a fun autumn beverage.

The Apple Harvest Fair: This persuasive text is an advertisement for a harvest fair.

October
In October, the texts become longer. Open-ended responses are added as teaching options. If you use these, of course be sure to always make sure that students have access to the text as they are writing their responses.

Pumpkins in the Past: This informational text explores how pumpkins have been used in the past.

Pumpkin Seeds: This historical fiction story is a retelling of an American legend. I always end up using this to teach several aspects of narratives, and kids love acting it out!

What's Up, Woolly Bear?: This is a hybrid text--informational text conveyed as a fictional interview with a woolly bear. It's a great text to use to discuss this kind of writing and the intersection of fact and fiction.

Idioms, Adages, and Puns: Wordplay abounds when I use this text! Kids like being able to classify sayings as idioms, adages, and puns, and the lessons from this text last all year long.

November
November is the month in which we really start to work with longer, more complex texts. Two fables are included in this packet, along with two informational texts.

The Wolf and the Dog: This fable brings up some interesting questions among students. It is another good one to act out with the class and discuss in depth.

Veterans Day: This informational text traces the roots of Veterans Day from Armistice Day.

The Bell on the Cat: A second fable, this one is a nice companion to "The Wolf and the Dog".

Voyage to a New World: This informational text outlines the voyage of the Pilgrims to America.

December
December includes only three texts, plus a choice menu for students to use over Winter Break. A "Focus on Complex Text" page is included with each text, forming the basis for a lesson helping students to look more closely at texts.

Remembering Pearl Harbor: Kids who enjoy learning about World War 2 find this informational text especially interesting.

Lighting the Tree: This drama takes place at the lighting of the first national Christmas tree in 1923.

Snowflakes and Scissors: How do you make an origami snowflake? Devin learns how in this realistic fiction story!


January
Winter Is: This poem shows a bit of a negative attitude toward winter. Students learn about speaker and speaker attitude in a poem.

Blizzard Warning: This informational text describes the impact of the Blizzard of 1978 on Boston.

Happy Australia Day: Kids enjoy this compare and contrast text that shows how Australia Day and Independence Day can be compared.

Fairy Bread: Another procedural text, this simple recipe explains how to make the Australian food fairy bread.


February
Do Polar Bears Eat Penguins? This text explains why polar bears are not predators of penguins. A good geography link!

Theseus and the Minotaur: Kids love this retelling of the classic myth.

Discover Antarctica: A fictional advertisement for an Antarctic cruise, this gets kids talking about whether they found the text convincing!

Facing the Flu: An informational text about...the flu!


March
I love these texts!

Frog Poems: Two poems about frogs, excellent for students to compare.

Point/Counterpoint: Two perspectives on Daylight Savings Time. This text is interesting for kids to read around the time that we "spring forward".

The Vernal Equinox: This informational text explains the vernal equinox.

A Stinky Sign of Spring: After we read this, kids have a new appreciation for skunk cabbages.

April
I love these texts too...they are perfect for warmer days!

Fishing: A free-verse poem about days of fishing.

Migrating North at Winter's End: This informational text describes the different cues that birds use to head north at the end of the winter.

What is Persuasive Text? This essay explains what persuasive text is.

Interview with a Great Blue Heron: Kids loved the woolly bear interview so much that I created another one, this time about the great blue heron.

May
The year ends with a set of four final texts.

Cheetah Cubs in Zoos: In this problem/solution text, students learn about problems that cheetahs have faced, and how zoos have tried to solve them.

Androcles and the Lion: This fable is a favorite for kids to act out and retell.

Some More S'mores, Please: A final procedural text, this makes a great end-of-year activity!

Memorial Day: This four-part script explains the history of Memorial Day.


Friday, July 31, 2015

Teaching and Gardening

If you follow me on Twitter you'll know that I love gardening. I don't grow vegetables or anything useful--instead, I focus on native plants and flowers for pollinators. But my garden is a great metaphor for my classroom. In fact, here are some things my garden has taught me about teaching.

Leave some edges unkempt

     In the garden, messy is beautiful! Last week I was trimming along the edges of a raised bed. The tiny crickets started jumping out. When I looked more closely, I saw spiders, roly-polys, and a whole world of mini beasts. I decided to trim more carefully, leaving some of the taller vegetation. These messy spots are home to so much diversity!
     In the classroom, the messy edges are the places where innovation happens. Sometimes these are the places where students try out something new or practice a skill. Sometimes these are the messy edges of my own teaching where I question a traditional strategy and create a better way.

Change creeps up

     As I've taught about the importance of native plants, I've planted more and more bushes and trees around my yard. I only have four-tenths of an acre but I seem to be filling it well. Slowly, a yard that started out as bright and sunny has changed. The section that was once the brightest and sunniest is now densely shaded. This happened so slowly that I didn't realize that I had changed my yard so much. But I had to adapt, and move plants that were once doing so well.
    This happens in the classroom, too. Small changes lead to big ones, and a strategy that had worked well for a long time needs to be removed or replaced.

Not everyone will like your ideal classroom

    Some people look at my garden and do not see what I see. Where I see an amazing ironweed, a plant with flowers to fuel hummingbirds for their epic migration, they may see a weedy mess. Where I see Virginia creeper, a native groundcover that I am slowwly beginning to love, they see an annoying vine. I understand this and I can't take it personally. Instead, I can be completely explicit and explain what I am doing and what the benefits are.
   And this happens in the classroom, too. Some people will notice the mess and not see that I have set up a workspace for 30+ people and we don't always put things away. We're too excited to move on to the next thing! Some people will see a student reading what looks like a super-easy book and not realize that this reader, in this year, has made amazing progress. Some people will see a classroom routine created by kids that is still in the fine-tuning stage. Just like in the garden, I have to be explicit and explain what I am doing and why.

It doesn't belong to you

    Over the years I've created a garden with the thought that it isn't really "mine" but is shared by all of the other living things who share the space--the bumblebees, the cardinals, the catbirds, the gray tree frogs.
     This is true in the classroom, to a much stronger degree. The classroom needs to be a shared space, and decisions need to be made for the benefit of all of our members. I am not in charge of everything in the classroom. This is actually very freeing!

Monday, July 27, 2015

Differentiated Spelling Program: Looking Back

Several years ago, I became disenchanted with the spelling program that I was using. I've been teaching for a long time, and I've used many different spelling programs. And I've hated them all.

A normal person would have said, "Well, this program isn't perfect, but it's what I have. I guess I'll deal with it."

I'm not a normal person. So I embarked on a three-year journey to reinvent spelling in my classroom. Along the way, I learned that the most commonly taught roots are not the ones that appear most frequently; that language is a devious, tricky pathway; and that I will always end up hating a spelling program. And that's okay.

Step One: Identify Words to Teach

One of my biggest issues with the spelling program that I had used in the past is the words. They seemed randomly chosen to fit a pattern. What if I could work in the opposite way--select high-utility words, filter them according to their attributes, and then plug them into spelling lists?

I started typing in words! My first source, of course, was the Academic Word List by Averil Coxhead. I added words 200-500 from the Fry List, the Nifty Thrifty Fifty, words from the Common Core, and words from a Reading Teacher article about character traits.

But just typing the words was too easy. I wanted data! I added columns to the spreadsheet with information about the words--number of syllables, phonograms, root or base, prefix or suffix, mythology link, and use in idioms. It was the work of many winter evenings.

When I was finished, I had an Excel spreadsheet that I thought was amazing. Not many others have thought so. But I didn't care much about how others reacted--my list was a stepping stone, a means to an end. Here it is if you are interested. (To use the filtering capability, you will need to download it.)

The Master Word List

Step Two: Plan Out Units

The next step was to plan out units. Because this was going to be a fourth grade program, I had to involve the others that I work with in this process. We combined our new PA Core Standards with concepts from the Literacy Continuum to do this.

Our units leaned more toward vocabulary and patterns of meaning instead of patterns of spelling. In looking at the core standards, there are so many things related to roots, prefixes, and suffixes that students need. Would I like to do more of the spelling-based patterns? Absolutely! But time is precious, and finite, and I needed to choose. In the long run, I do think that time spent working with prefixes is going to have a stronger impact than time spent working with ei/ie patterns.

Because we work in the real world, we limited our units to 12-15. We were planning to teach spelling on alternating days for 30 minutes at a time. A program that can be completed in one year is better than one that claims to do all things for all students, but can never be finished.

After Year 2 we rearranged some lists, realizing that putting prefixes and suffixes before word roots is better for students who don't have much experience with semantic analysis.

Step Three: Assign Words to Lists

This was my Frankenstein moment--"It's alive!" This was the time to use the filtering capabilities of the Master List to select spelling words. And...it worked! Even better, every list includes high-quality words that students WILL encounter again and again. With each list kids came to me with words that they found in their independent reading books, in their science books, and other academic tasks.

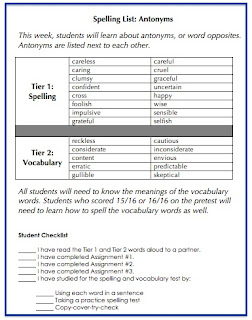
Our lists are tiered lists. On Day 1, students take a pretest with Tier 1 words. Students who reach a certain score work from the Tier 2 list for spelling throughout the week.

Step Four: Create Meaningful Activities

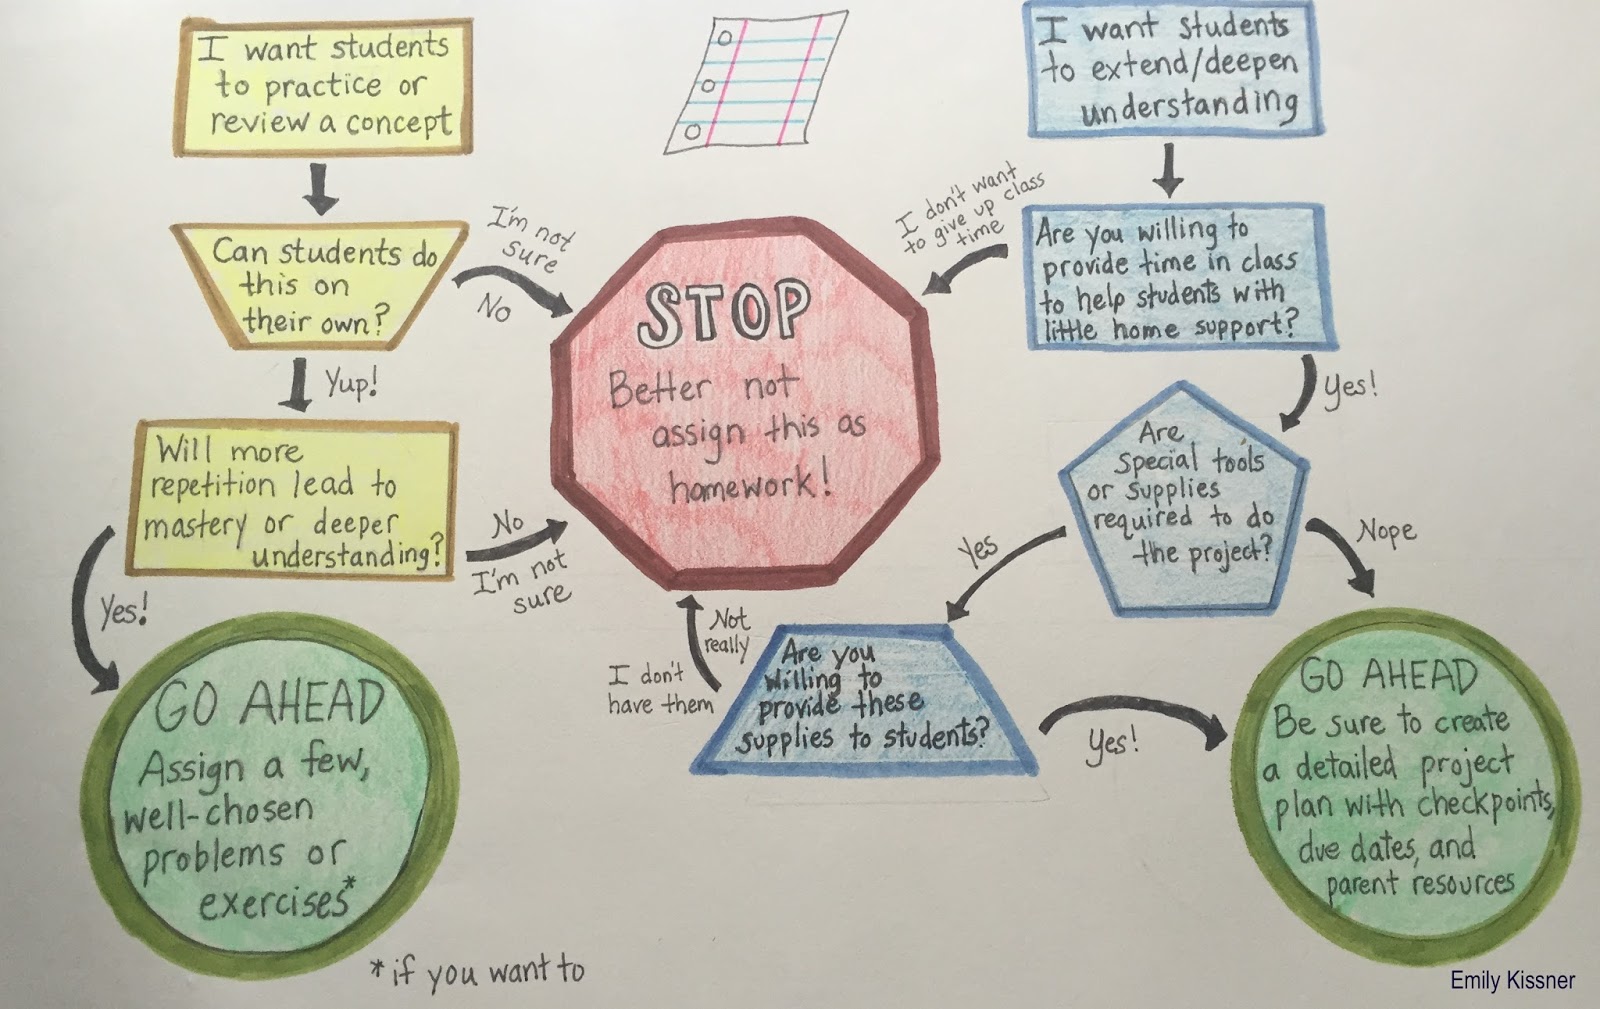
I undertook this step on my own, creating list-specific homework tasks for each list. These tasks are also heavily vocabulary based, with some handwriting included. Of course, I never grade homework, and if you use my materials, please make sure that you don't grade homework either!

 There is also a list-specific spelling test for each list, including both spelling and vocabulary questions.

Everything is included in this folder on Google Drive. You may feel free to use these materials, but obviously do not sell them or distribute them in any other way. Make sure that you are viewing the folder in ABC order so that the files show in the correct order.

Spelling Folder

Step Five: Implement and Reflect

Like every spelling program, this has parts that I love, and parts that I hate. I really enjoy exploring the meanings of words with students each week. Students especially enjoy the drawing tasks, and their creativity shines as they create new and interesting ways to depict the words.

The pretest always invites interesting conversations, as some students try to cheat and correctly spell the words. Why do this on a test that isn't graded? What are they trying to prove? Being open and honest with these discussions gives everyone insight into our classroom routines.

I also like that this program is fairly easy for parents to understand and assist with. Definitions for all words are included in my Quizlet links (you can find them all by clicking on my username here).

Step Six: When all is perfect, change grade levels
Because what's more fun than starting from scratch?

**You may feel free to use and share the Master Word List and the spelling materials here. Please know that these are shared folders and others have added materials! If you find any mistakes, let me know so that I can fix them.

If you especially like them, please consider a visit to my store for other classroom materials.