Showing posts with label science. Show all posts

Sunday, April 7, 2019

Build STEM Enthusiasm with a Microscope Center

Spring is a fantastic time to add a microscope center to your classroom. For students in grades 3-8,
microscopes are a gateway to science: awesome, amazing, and irresistible.

Spring brings vernal pools, which are home to a great diversity of small creatures. These tiny animals can be spotted with the naked eye, but come into greater focus with the microscope.

You don't need to be an expert in microscopy to help students discover amazing tiny creatures. (I'm certainly no expert!) All you need are microscopes, a safe place to put them, and the flexibility to let kids explore.


What You'll Need


In my classroom, I use a counter area for my microscope center. If you are using microscopes that plug in, you will want to make sure that you have safe access to an outlet with no dangling cords. (Trust me: Kids will trip over any cords that you leave lying about!)

Brock Magiscopes, if you can find them, are the best tool for informal classroom investigations. They focus easily and are quite rugged, making them perfect for younger students. Magiscopes don't need an outlet, either, although a nearby light source improves images. You can see in the photo that I've covered the slight depression of the magiscope stage with a piece of transparency film. This is important when working with water samples because kids will manage to spill everywhere.

Plastic slides are helpful, especially if you can get these with wells. If you don't have slides, you can always use old transparency film that you've trimmed to size, or even the cut bottom of a clear plastic cup.

  Plastic pipettes  help students to transfer water and get small samples. I'm still using the pack of 100 that I purchased 8 years ago!

Some plastic petri dishes can also be helpful for isolating small creatures. Again, I'm still using what I bought years and years ago.


I love "A Guide to Microlife" by Kenneth Rainis, but it's getting harder to find. Don't worry, though; there are plenty of online resources to the creatures that you might locate.

Setting Up

My center can accommodate 3 students at a time. I have 3 microscopes, 2 plastic petri dishes, and 2 droppers.

I've found that using cover plates leads to more mess for my students.

It's important to limit the materials at the center! If you have too many supplies out, kids will use them with abandon. Especially the droppers.

Depending on where you have placed your microscope center, you may want to use masking tape to mark a location in which all materials must be kept. A dry erase board with rules and reminders helps to keep everyone on task.

Most importantly: Have a notebook in which students can record their observations.

Obtaining Samples

Vernal pools are amazing for water samples. A vernal pool is a water source that is only wet during the spring. I always manage to find more creatures in vernal pool samples than in any pond samples.

I live in a rural area, so it's easy to find vernal pools where I can legally take samples. Be sure to get permission wherever you choose to go! Students and other faculty members can be good resources for obtaining samples as well.

I usually get samples in a Tupperware container or mason jar. Standing at the edge of the pool, I let water enter the jar and scoop in a few leaves as well. Once the water settles, I observe the container closely. If I see a few things that look like tiny dots darting through the water, I know that I have a good sample.


If you are getting samples in March or April, when the weather is still cool, you probably won't have to worry about accidentally getting some mosquito larva. At other times of the year, make sure that you don't have wigglers in your sample. They're easy to spot, but would probably lead to some classroom issues....

Introducing the Center

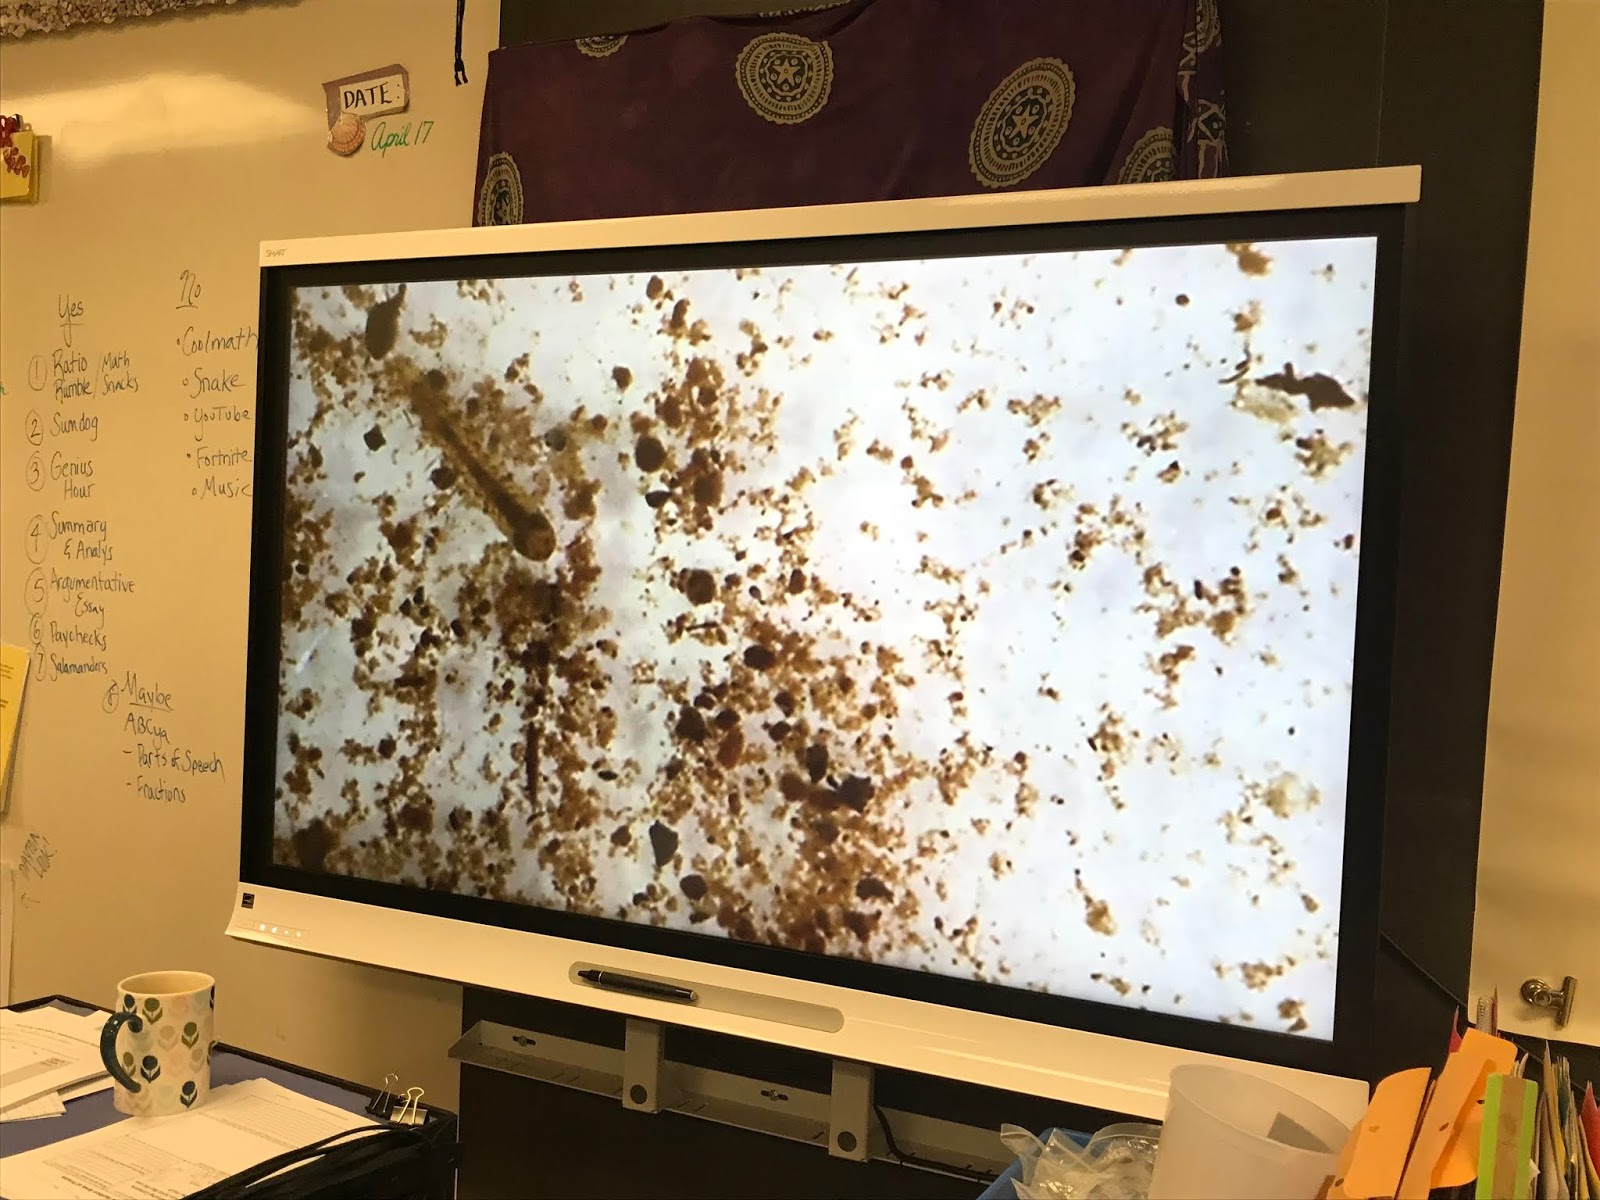
If you have a document camera with zooming capabilities, you can show students some of what is in the sample by displaying it on the projector. I have found that showing the pond water with very little commentary leads to great questions from students: What's that? Where did you find it? Can I see it? Once these questions come out, I introduce the microscope center and briefly outline rules.

For the first sessions, I find some creatures and get them in the microscopes for students to see. Once I've done this, students quickly catch on! When the class has work time, I add the microscope center to the list of allowable activities. I also have a five-minute timer going to make sure that everyone gets equal access.

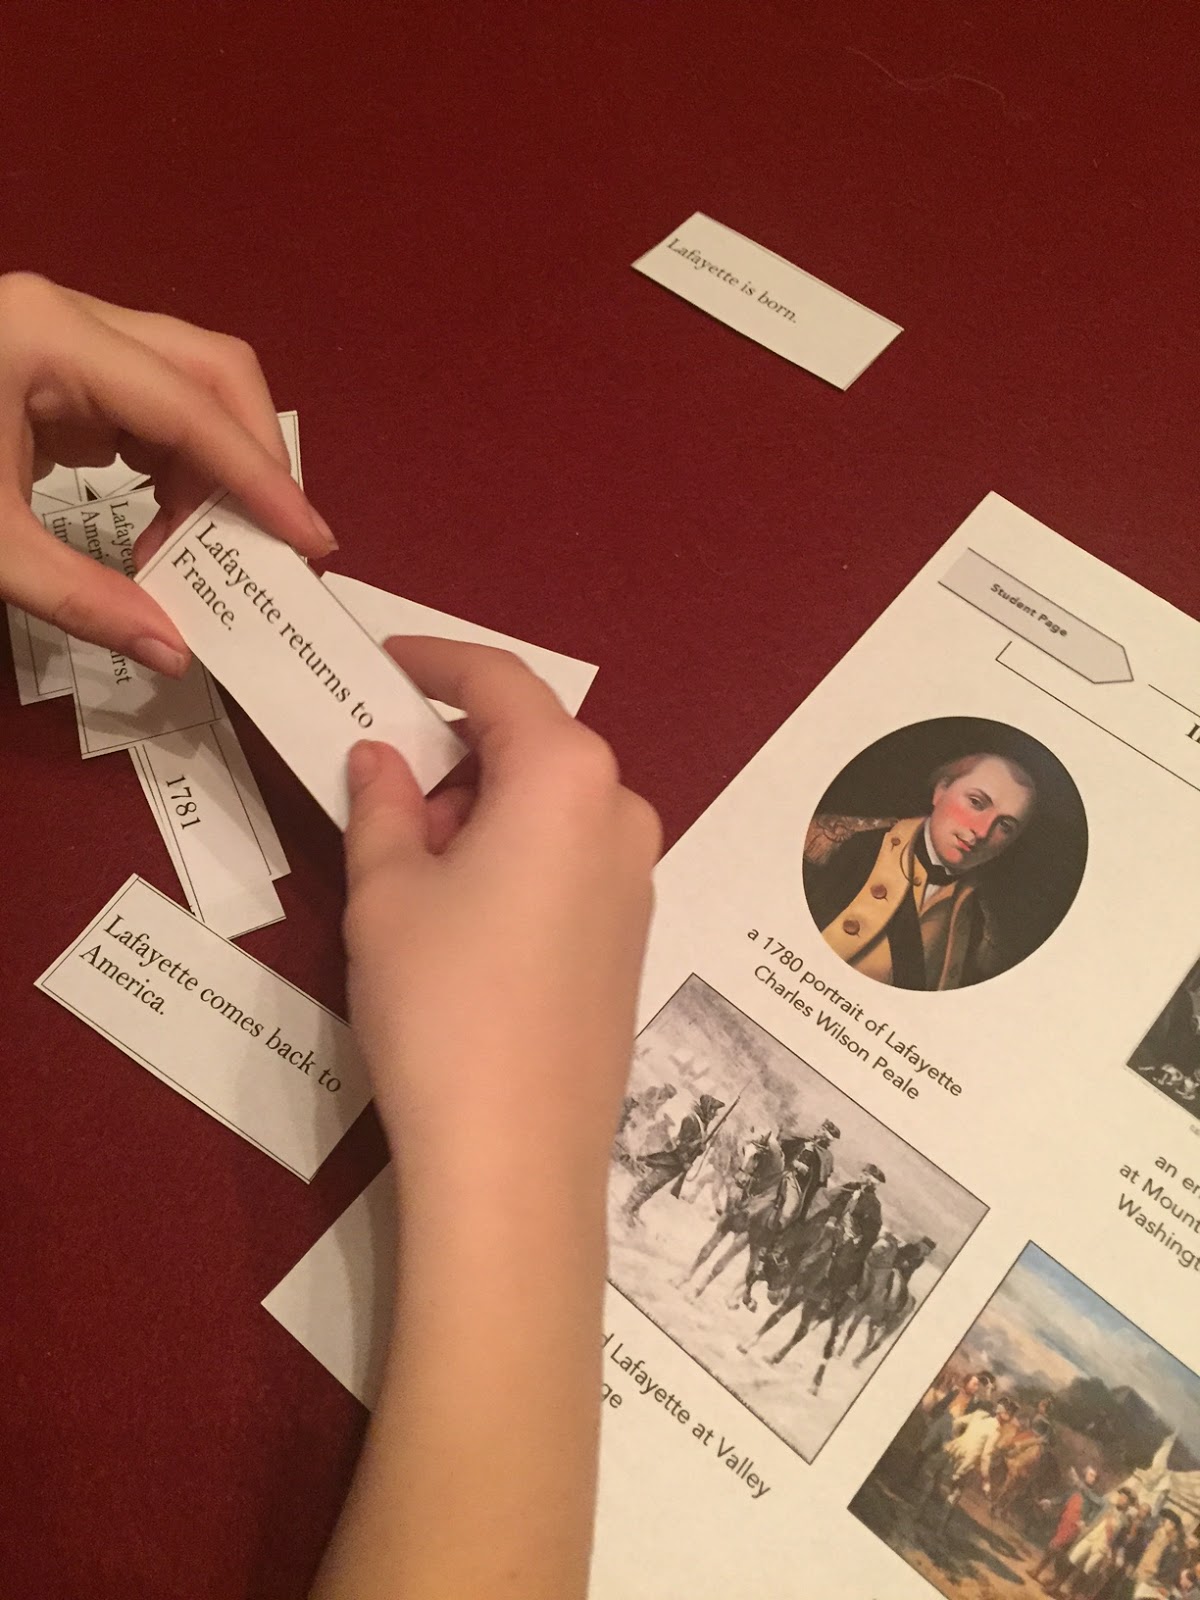
I also have students put sketches of what they see into their own interactive notebooks. These sketches serve as models for what students will put into the class book of observations.

Putting a single student in charge of making sure that the materials are cleaned up and samples returned at the end of each class is very important. This year, the student in charge takes great pride in making sure that everything is well taken care of.

What will you find? Every year is a little different! Most vernal pools have copepods, which can be seen with the naked eye but come into great detail with the microscopes. This year's samples have a surprising number of daphnia, and students even saw some eggs hatching! We've found that this resource from the Pennsylvania Natural Heritage Program has great information about the invertebrates we see.

Personalized Learning

At first, I make sure that everyone gets a chance to try out the microscopes. As the novelty wears off, a few students continue to check out the water. Some like playing with the droppers. (I think that water play is extraordinarily important and underutilized for students.) Others really like finding new creatures. This week, I've heard, "Mrs. Kissner, I've found a new bug!" at least ten times.

The term "personalized learning" is often used to apply to tedious websites with structured sets of activities. But I think it applies to a microscope center as well! How amazing is it for students who find this engaging to be able to have access to water and microscopes on a daily basis? 


Saturday, February 2, 2019

Paper Airplanes and STEM: Getting Started

   
 Looking for a fun lesson set that incorporates STEM, writing, reading, and data collection? Try a paper airplane challenge! I'm on my third iteration of this project, and each time it just gets better and better. It's a perfect way to get rid of the winter blues and do something fun and filled with learning.

The challenge

     This year, I set up the challenge like this: Aeronautics216 is looking for a paper gliders that can travel 15 meters indoors AND outdoors. Teams are asked to submit three airplanes for testing.
     ...that's it. I don't even set up a huge competition or offer a prize, because the actual activity is so engaging and awesome that it doesn't need anything else to prop it up.

Groups and Budget

     I used a Google form to get input from students as I set up the groups, assigning students to be lead engineer, graphic designer, writer, accountant, and materials manager. Groups of 4 and 5 work best, especially at a time of year when absences are frequent. If two people are missing from a group of 5 the remaining stude
nts can get on with the work. Two missing from a group of 3 leaves a pretty lonely student!
    In my first two attempts at this project, I wanted groups to have plenty of money. This time, their margins are pretty slim. I also used actual bills this time instead of just paper accounts by printing out $100 and $500 bills from Classroom Economy.
     Students may use as much recycled paper as they want for prototypes, but they must purchase the paper for submission planes at the price of $500/sheet. They also have to pay for extra testing sessions, marker rental, storage, and so forth. You can find the complete budget here.
     Most students don't realize at first just how far 15 meters is. They read it as "15 feet" and it only slowly dawns on them that the task is a lot harder than they thought.

Flight Rules

     An important rule that keeps this from devolving into chaos: Planes can't be tested at school until the official testing day.
     I had to fine groups $200 for breaking this rule on the first day, and it was remarkably effective. Since that initial problem, I've had no issues.
     Kids ask, "Can we take them home and test them there?" What they're really asking, of course, is "Can I do extra homework?" But I don't tell them this, and I say reluctantly that sure, if their parents are okay with it, they can make and test planes at home.

Working in groups

     In the first two sessions, students work pretty intensively on creating group names, logos, and airplane prototypes. Everyone knows how to build the standard airplane, but those are unlikely to fly 15 meters. So students use the sets of directions that I have available to try to build other versions.
     I make the video directions more costly than the printed directions because I want students to feel that struggle of reading procedural text. Airplane directions are a great equalizer, because some students who are great readers have trouble with the folding, while other students who may struggle with reading find the layout and structure of airplane directions to be a piece of cake.
     You can find plenty of paper airplane directions online, although the best source that we've found is the Klutz Paper Airplane Book.
     When there are issues in groups, I offer my (paid) services as mediator. I also give ratings sheets so that group members may rate each other on cooperation and responsibility. Once this happens, groups tend to pull together. (I admit that dealing with the inner workings of groups is my least favorite part of this activity, and that I treat it as my own area for personal growth!)

Initial testing

     Before the first testing session, groups need to make their own data collection sheets. Most of my students haven't made tables before, so I showed them this video from GCF LearnFree about creating tables in Google Docs. (Why tables instead of spreadsheets? Students are handwriting information into printed sheets, so I thought the table would give them more options.)
     I had two students who were finished with other tasks set up our testing zone in the hallway by marking out meters with masking tape. Two groups tested at a time, following a strict protocol that meant that the hallway was clear before airplanes flew. Groups had 6 minutes for testing, which seems like a short time but was adequate if they got straight to work and didn't play around.
     I recommended that groups have at least 5 planes for testing, but of course some groups did not. That's part of the process! Most of the planes went only 5-6 meters. The best performing plane went 13 meters.
     Looks like the groups will have to do some rethinking when we return to school next week! I'm hoping that they think to ask the group with the farthest flying airplane which model they used (the Hammer) and build more prototypes along those lines.

Looking forward

     In the week to come, I'll collect the data from initial testing so that we can practice finding landmarks of data like mean, median, range, and mode. This will help students to contextualize their results. Students will be busy building for their second round of testing!

Tuesday, January 29, 2019

What to do with a classroom bird feeder


Choosing Feeders

    For the widest variety of birds, think about your levels. Some birds like to eat from the ground, others from hanging feeders, others from suet, and still others from elevated trays. Of course, your classroom location will determine which birds visit your feeder. When I was on the playground side of my school I was visited by very different birds than we see on the forest side.
    I decided to start small with the free feeder from BirdSleuth (offered occasionally). Over the past five years, I've added more and more! It's important to choose something that is easy to clean, inexpensive, and sturdy.
     Trays: A plastic tray is a great starting point because it's easy to clean and easy to replace. Because I have a heating unit right outside my window, I have the perfect spot to place a tray of sunflower seeds. (I buy the 40 lb. bags at Tractor Supply, which last about 2 months for $20)
     My students love the juncos, cardinals, chickadees, and finches that come to the tray. We sometimes put out unsalted peanuts, which attracts my class's favorite: the blue jay.
     Tube feeders: These are cheap and attract a nice variety of finches. Last year, though, we had record rainfall, and I did find that mold sometimes grew in the nyjer seed.
     Suet feeders: Suet is inexpensive and attracts woodpeckers and nuthatches, which are fun to watch. If you are not near a forest, you may find that starlings come to get your suet, which is also interesting.
     Peanut butter: In the years that I don't have any students with allergies, I purchase peanut butter to put outside as well. You can see the feeder in the photo above, but honestly it's easy enough to just smear peanut butter on some branches or put it on some wired pine cones. The Carolina wrens love it! Plus, it's way cheaper than many other kinds of seed.
     Feeder cam: No place for a feeder? No problem! The Ontario FeederWatch and the Cornell Birds Feeder are great to display for students.
    Feeder cleaning: Whatever kind of feeder you use, be sure to clean it frequently so that you are not inadvertently spreading disease.

Identification

     Part of the fun of observing birds is learning their names. I like to use a classroom birds slideshow as a fun icebreaker at the start of the school year. Kids like practicing their identification skills with photos I've taken at the window. They're often amazed to find out how many different species we can see just from our classroom.
     The allaboutbirds.org site is excellent for teaching students website navigation skills. I especially appreciate that it doesn't have external ads! With these webpages, you can teach all about digital text features, navigation, and browsing. There are great nonfiction texts there for the reading as well.
     Will your students make some identifications that sound silly at first? Absolutely! It's only through practice that students learn how to find the maps to see if a bird lives in their area, how to sift through the photos of similar birds, and how to connect bird behavior to different types of birds. Be patient and make the identification process a learning experience from start to finish.

Bird Observation Journal

     Once students get to be good at identification, I get out the bird observation journal. This is a place for students to record what they are seeing at the window. Kids may get up and look out the window, one or two at a time, as long as they write down what they see.
    Each year, students decide how they'd like to organize the journal. Sometimes students prefer to go by hour, while at other points students like to just write down what they see in a more casual way.
     There are occasionally discrepancies and problems with our data, which just means...we're doing science! When there are issues (wait, that wasn't a white-crowned sparrow, it was a white-throated sparrow!), we can discuss what these mean for our data and what to do next.

Phenology

     The records in our observation journals then become data for future years! We can track when the juncos will arrive, when the white-throated sparrows will leave, and when the goldfinches will turn yellow. As I tell my students...it's all because we noticed what was there and wrote stuff down.

Closing Thoughts

     I'm not sure when the process of knowing what lives around us and following the patterns of season and sky became unworthy of teaching. When I was in fifth grade, I told my teacher that I wanted to be a naturalist when I grew up. She said, "That's not a job."
     This is the kind of thinking that has brought us here--facing a future with insect populations in collapse, monarch butterflies disappearing, once familiar birds of field and forest now rare and unseen. You can't love what you don't notice. Taking the time to help students appreciate and love what surrounds us is worth the effort.
   

Sunday, November 25, 2018

Building Content Area Reading Experiences

I'm delighted to be presenting about content area reading experiences at Shippensburg tomorrow! Well, I admit that I'm not delighted about driving "over the mountain" on the first day of hunting season...but I know that it will be enjoyable to talk about content area reading.

Content Area Reading Presentation
You can find the link to the presentation here. Because I do periodically clean out my folders on Google Drive, you may want to save a copy to your own Drive if you think you'll refer back to this later.

Other content area reading posts
Anticipation Guides: Read more about one of my favorite content area reading strategies.

Nominalizations: No one ever talks about these word constructions, and in my mind, that's a shame. Nominalizations really wreak havoc with the reading comprehension of learners, and understanding their role in text helps students as readers and writers.

Animal Adaptations Synthesis: A reflection about an activity that I led with fourth graders.

Previewing Content with Phenology: How to find out what vocabulary words your learners already know.

Concept Maps: How to develop knowledge with students by making concept maps


Friday, June 29, 2018

Sixth Grade Science: Tracking Hurricanes with Students

Our sixth grade science curriculum has shifted to covering more of the middle level earth, space, and atmospheric science standards. Last year, I worked with this by adding a new science starter for the fall months: hurricane tracking.

Tracking these storms is important for the classroom in several ways. First, every time we track a storm, students build their geography skills, practicing using latitude and longitude to find a location. In addition, tracking storms adds a real-life current events component to science class. Students see firsthand how science techniques like collecting and analyzing data are important to everyone! I also like to use the technique of tracking storms because it helps students to work with a topic over a period of time. It's not just a one-day lesson, but an ongoing synthesis of data and ideas.

Preparing to track storms

I have several items in my classroom to help me track hurricanes. At the start of the school year last year, I made a list of the Atlantic basic hurricane names for the year. (Future lists) Next year, I think that I will add the Pacific basin as an extension for students who work quickly and would like an extra challenge.

In addition, I made a packet with about 10 copies of the Atlantic tracking chart, available from NOAA. You can find the tracking charts here:

Hurricane tracking charts

One thing that I always fix up when I make copies is to make the latitude and longitude markings a little larger, as sometimes kids say that they have trouble reading the tiny numbers.

I also include a Know-Wonder-Learn chart in my booklets, as well as a listing of hurricane intensity categories.

Daily routine

We quickly fall into a daily routine of hurricane tracking. I start the class by projecting the Active Tropical Cyclones page from the National Weather Service. Last year was an active year, so we had lots of storms to track!

I wrote the latitude and longitude of the day's storm or storms on the board, and students found those coordinates and marked them. Some liked to use multiple colors to mark storms, while others found a pencil to be sufficient. We put the date and the name of the storm in small writing next to the storm.

I kept track of the data on a chart in the classroom so that students who missed a day could quickly catch up.

The question of whether to track tropical disturbances comes up frequently. In most cases, I leave it up to the class. If a disturbance has less than a 30% chance of developing, then we usually don't mark it. But sometimes students want to record the information, especially if there aren't any other active storms that day.

As students become more independent with the routine and depending on our other activities for the day, sometimes they do visit the NHC website and record the information on their own. There are many other educational activities on the site for students to explore, and they enjoy bringing new information to share with the rest of the class.

Wonderings

Students quickly notice the difference in markings between a tropical disturbance, a tropical storm, and a hurricane. (Here's a reference if you're curious.)  They begin to use these different notations in their own tracking charts. With the document camera, I can project the hurricane charts of several students so that we can discuss what they have in common and what they may want to work on.

Students also start to notice that most of our Atlantic hurricanes start off the coast of Africa. This leads them to make hypotheses about the tracks of future storms. When some storms don't act in the ways that they expect, students begin to wonder about what other variables may be influencing them.

I always approach hurricane tracking with a questioning frame of mind. I'm not at all an expert in meteorology, but I've learned a lot from three years of hurricane tracking!

The emotional impact

There is definitely an emotional side to tracking storms. Located as we are in Pennsylvania, severe storms rarely reach us. However, students are still anxious about the impacts of storms.

It's tough to stand in front of the classroom and discuss with students whether a tropical disturbance will turn into the named storm Maria one week and then watch it wreak havoc the next. As I remind students, though, these things will happen whether we track them or not. Knowing about the storms and being a fully informed citizen helps to make severe weather less scary in the long run.

Extensions

On days with no storms, we build background knowledge with videos and lessons. Here is a playlist of my favorites.


Tuesday, November 7, 2017

Hands-On Experiences and Reading Comprehension: Building Motivation

    We all know those readers: the ones who voraciously devour every book, who love finding new details about the topics that they love, who read and read and read.
    As a classroom teacher, it's easy for me to identify these students and build a classroom to support them. I love to use flexible assignments so students don't have to waste their time with busywork; I build a wide classroom library with texts on many topics; I make time in the classroom for students to share their lives beyond school.
    But I don't want to stop there! I want to turn every reader into a motivated reader. This is more easily said than done, however. How do we create engaged readers?

Stream Study Flip-Flop
    This fall I took students on a field trip that included a stream study. In previous years, I had made sure that students were well prepared for the stream study ahead of time. We read texts about the biotic index, we practiced identifying stream creatures, and even did practice inventories.
    What made this year different? I focused a bit more on watersheds at the outset, which meant that the stream study readings would have to take place after the field trip. I was even a little annoyed at myself at my poor timing when I realized this!
    When students jumped into the text after the field trip, however, I realized that something amazing had happened. I used a text from my Problem and Solution Text Structure packet called "The Biotic Index."
     In past years, students have had trouble moving beyond the topic of the text (macroinvertebrates) to be able to think about the structure of the text. This time, though, they showed far deeper comprehension. As I walked around the room to listen in on their partner discussions and see their graphic organizers I could see evidence of stronger connections and more effective analysis. What was happening?

Stimulating Tasks

As I thought about my observations over the next few days, I remembered a line of research into stimulating tasks. I found these journal articles while researching my details book (The Forest and the Trees: Helping Readers Identify Important Details in Texts and Tests, which was so much fun to write but which only 2 people have ever read.)  Shortly after I finished the book, the curriculum pendulum shifted to common core, and discussions of reading motivation faded into the background as everyone clamored to talk about text complexity and textual analysis.
    The article in question, "Influences of Stimulating Tasks on Reading Motivation and Comprehension" discusses how building situational interest in students can improve their reading comprehension by building motivation for reading. The process described in the article turns around traditional classroom practices by putting the stimulating task before the reading experiences. In this arrangement, the hands-on activity (like dissecting owl pellets) happens before the students read. What happens next is a cascade of good things: kids are interested in the topic, so they read more; as they read more, they are motivated to unlock the meaning of the text; as they unlock the meaning of one text, they gain the keys to unlock more. The authors of the article put it best:

 
    They have a sobering picture for students who don't get to experience a classroom with opportunities for situational interest: "Likewise, students who have fewer experiences of situational interest in reading will have fewer opportunities for experiencing competence in gaining valued information, fewer occasions for directing their learning, and fewer interactions with peers."

    So my mistiming of the macroinvertebrate readings turned out to be positive...especially because it led me back to a line of research and thinking that I had half-forgotten. It's helped me to realize that the goal of creating engaged readers is not so elusive after all. When I feel pressure to conform and just assign the worksheets like everyone else, it's journal articles like these that keep me planning the crazy field trips and buying the stacks of books at the used bookstore.


Friday, August 11, 2017

Leading Stream Studies for Kids


This summer I've been having a great and relaxing time stepping away from the classroom for a bit. I've been reading and reading and reading, writing, and volunteering to lead stream studies at a local summer camp.

Doing informal stream studies all summer has helped me to really fine tune the process of leading a stream survey with kids. I want to start by saying that it's really difficult to get the perfect balance between fun, learning, and respect for stream creatures. (Anyone who says differently just isn't watching the situation closely enough.)

It's also helped me to realize the importance of stream surveys for science education. Getting kids into a stream and looking for living things immerses them in scientific thinking. So...here's the accumulated wisdom that I've managed to gather over the summer!

Get the Right Materials

These are the things that I found most useful:
-white ice cube trays
-local stream ID guides (the one included in Project Seasons is great for younger kids)
-local fish species guide (the Pennsylvania one is available here and wonderfully useful)
-colanders
-small aquatic nets
-larger basins

Find the right site

Not every spot in a stream is suitable for a stream study, especially for younger students. The best spots have a nice, rocky beach, plenty of shade, and a variety of stream habitats. As the adult in charge, remember that you are responsible for the safety of the children, so make sure that you have walked the entire section of stream to check for hazards such as deep pools and poison ivy. Also, be aware that some kids will absolutely not want to walk in the stream. This is fine!

Choose a site that provides a walkable bank to allow for this. Remember, for some kids a stream is a mysterious, almost frightening place--you want them to be able to explore at their own pace.

Prepare the kids

Before anyone gets in the stream, brainstorm safety rules and boundaries. Remind students that the rocks are often slippery, and act out best practice walking techniques, especially with "seesaw rocks". You can learn a great deal about a group by asking the question, "What do you think we'll see?" Because I'm in rural Pennsylvania, many kids bring knowledge of minnows and crayfish to our stream studies! In other places, you may find different levels of stream knowledge.

This is also the time to briefly outline the collection tools and proper handling of stream creatures. "We don't want to harm anything!" I tell kids, and they earnestly agree. The ice cube trays are perfect isolation containers for individual creatures, while the larger basins hold fish and crayfish. Be sure to keep everything in a shady spot so that temperatures don't soar!

Phase 1: Open search

This is what I hit upon over the summer that made stream studies so much more successful. Instead of talking about the biotic index and macroinvertebrates first, I got kids into the stream as quickly as possible.

Inevitably, they gravitate toward catching crayfish, salamanders, and minnows. This is fine! These are the obvious creatures in the stream and they want to capture them. I walk up and down the collection area, making sure that things are going well and offering advice.

Regroup and Discuss

After about 15 minutes, get the group back together to discuss what they have found so far. Write down the species of animals that students have found and do a quick biotic index. Here's how it played out with my most recent trip: "We've found 3 species of animals so far, and we have a score of 2 on the biotic index. But an earlier group found 11 species and had a score of 18. What do you think is different today?"

In every case, kids saw quickly that they weren't looking carefully enough! This is when I introduce the term macroinvertebrates and show kids the stream study guides. Now that they have found the salamanders and minnows and crayfish, they are much more receptive to looking for the smaller mayfly nymphs, water pennies, and dragonfly larvae. (Why is this? I have no idea!) Depending on the age of the group, we even act out turning over rocks, looking for creatures, and gently returning them to their original locations.

This is also when I briefly outline the biotic index and how to use it: "Scientists have a tool called the biotic index to help us make a good guess about a stream's health. By looking at the macroinvertebrates in the stream, we can see if the water is high quality or not."

Phase 2: Biotic Index

Kids head back to the stream for a second round of collections, and this time they use different methods. On this phase, we find the dobsonfly larvae, the mayfly nymphs, and the caddisfly larvae. As they put creatures into temporary observation containers kids also inquire about their biotic index score and the number of species they've found. Some playful competition between groups and weeks helps kids to see what kinds of scores others found in the same stretch of water.

Debrief and Return

Of course, all of the kids want to see the creatures that were found and hear their names. I have kids stand in a circle while a counselor or another camper walks around with the specimens. Then, each item is carefully returned to its home. I always emphasize the safe return of creatures as the most important part of the process. Our goal is to help the stream to stay healthy and harm no living things.

Finally, we discuss the overall health of the stream. Does this stream have high water quality, or not? How can they tell? What can they do to keep it healthy?

And that's it! The final step--send kids back with their counselors and return to my car, where I have a cold VitaminWater waiting for me in a cooler. Ah, the joy of a cold drink after a long afternoon!

Do you have tips for conducting stream studies with kids? Add a comment!

A Closer Look


If you're working with macroinvertebrates in a formal lesson, you may enjoy the reading selection in Summary and Analysis: Macroinvertebrates or the Biotic Index text in Problem and Solution Texts.

Sunday, March 12, 2017

Ongoing Science

As a young child I visited a summer camp high in the Laurel Mountains of western Pennsylvania. In a sunny glade there was a small log cabin, the demesne of "Miss Alice" the nature teacher. The cabin was filled with all kinds of interesting objects, from turtle shells to paper wasp nests to butterfly wings. Posters of all different ages lined the walls, and new field guides mingled with old mimeographed booklets. It was a place that invited inquiry and curiosity.

Thirty-five years later, I try to cultivate a classroom that feels like the nature cabin. I used to feel embarrassed about this and wish that my classroom looked more orderly and tidy. But I've decided not to feel embarrassed at all. Just like the nature cabin invited me to explore and ask questions, I want my classroom to invite students to do the same.

Birdfeeders
One of my classroom jobs is the "ornithologist", and these students have the task of refilling the birdfeeders each day. I do buy my own birdseed for the classroom, large bags of black oil sunflower seed and suet cakes every few weeks.

It's interesting to watch how students interact with the window and the birds. Many stop by to take a look outdoors as they are going from task to task. They have their own names for the birds--"the chipmunk bird" (wren) and "the one with the mohawk" (tufted titmouse), and they correct each other quickly when needed.

This week I overheard two boys talking about their favorite birds: "I like the female cardinal best. The orange beak is just so cool."

The other student said, "I like it when the blue jays come. They're awesome."

Pond water
Science instruction should be ongoing and pervasive. While one-shot lessons and visitors are fun and engaging, real learning happens when students have many opportunities to explore. Too often teachers get out the microscopes for a single unit (usually a "Science Tools" unit in my area) and then neatly wrap the cords and put them away.

I like to keep the microscopes out for weeks at a time! Right now, I have a pond water exploration station in my classroom. This is a great time to get pond water because there aren't yet any mosquito larvae, but there are lots of copepods, mites, and clam shrimp.

A simple set of guidelines lets students know what to do, and then the station runs itself. Just like with the birds, students stop by, engage for awhile, and then go on to other tasks. It's so interesting to see that some students have extraordinary microscopy skills and can focus patiently on very small creatures. One student called me over to the more powerful microscope to show me the tiny clam shrimp swimming!

So while my classroom may not be the tidiest, I definitely love having natural objects for students to explore. How is your room like a nature cabin?

News and Notes
I finished another Summary and Analysis packet! This one includes a biography of Robert Louis Stevenson, a summarizing page, a text-dependent analysis, and a comprehension quiz. Robert Louis Stevenson is frequently anthologized and his writing often appears on standardized tests (my cynical opinion: his writing is public domain, so using a story or passage of his cuts down on costs!) Helping students to see how his writing related to his life and times was an interesting activity.

Close Reading with Chronological Order Texts Grades 5-6  is a reimagined version of some previously published chronological order texts. It includes lesson plans, activities, and a text-dependent analysis prompt. Try it out and let me know what you think! (If you have already purchased the original Chronological Order texts set, re-download and you'll get the new items for free.)


Saturday, December 5, 2015

Collecting and Analyzing Data in Science

The weird toys that grow when you put them in water make a great hands-on measurement activity. Here's how:

1. Get some growing objects! Here's a set from Oriental Trading that is WAY cheaper than the set that I purchased at a craft store. I got four holiday-themed items (penguin, snowman, Santa, tree), one per group in my classroom.

2. Introduce the students to the activity. I worked with small groups of students as the rest of the class did some volume measurement practice with this activity from Kate's Classroom Cafe. We discussed the activity and made some initial measurements, recording the length and mass of each item at the start of our activity.


Even though I know that the sixth graders have studied length and mass before, there were still some questions about how find the millimeters and how to record the length in centimeters with a decimal. This initial small group activity was the ideal way for me to figure out what kids can do and what I need to spend more time working on.

3. Submerge...

4. Record data day after day! You can make a data chart for students, or engage them in making their own. Because I knew that measurement was an issue, I had kids create their own charts with specific measurements. On some days, groups of students found the data; when time was an issue, I'd pull individual students to do the measurements for the class.

I love the Amazon Basics kitchen scale that I bought for the class this fall. The $12 price tag means I don't have to worry when kids take it to different places in the room or weigh sopping wet penguins on it.

5. Discuss the findings each day. I started the conversation with "What do you notice?" and encouraged the use of scientific vocabulary like increase, greater than, and less than. Kids noticed that the tree lagged behind the others in growth, while Santa stayed true to form (much to their amusement!) When students expressed doubt at the data, as with Santa's growth, I encouraged them to take the next step and do the measurements themselves.

6. Graph. This will be our big task next week. I'm going to have students figure out the intervals and build the graphs from scratch, which will take some time. However, it's definitely something that sixth graders should be able to do! (Plus they'll get to use the fancy markers, which they love.)

7. Analyze the data. The toys that I bought make an interesting claim: "Grow up to 300%". Stating whether this claim is accurate or not will be a great way to bring our work with measurement into the real world.

I've been excited to see this unfold in the classroom and watch as the students get better with measuring length and mass. It's added a fun dimension to the sometimes dry "Preparing for Science" unit.

News and Notes
As my own kids and I were talking about the gingerbread man during holiday decorating, I got an idea for a story. What were the ingredients that caused the gingerbread man to come to life? And could someone apply the scientific method to making their own living gingerbread? I took these ideas into a fantasy world that I've been playing around with and "Dancing Gingerbread" was born. 

Sunday, September 20, 2015

Depth of Knowledge in Science

As I move from teaching fourth grade to teaching sixth grade, I've noticed a great deal of overlap between the two curriculums*. This is not necessarily a bad thing, as so many of the big concepts are really important. However, knowing what kids learned in fourth grade is leading me to try to delve more deeply in sixth.

In the first few weeks of school, I reorganized an existing activity to add more depth. Originally, the activity was a standard water cycle model. You can see them in the photo to the right. The original activity had students identify the evaporation and condensation going on in the model.

How could I ratchet up the thinking in this activity? I decided to explore the word model. What is a model in science, and what is the role of a model? Both our PA standards and the NGSS place an emphasis on the creation and analysis of models in science class. However, not many traditional curricular materials for elementary school engage students in exploring the worth of a model.

So then, after we made the models, we didn't stop at looking for examples of condensation and evidence of evaporation. Instead, I asked the students:

Is this a useful model of the water cycle? Why or why not?

Students referred back to the water cycle diagrams that we had made together and worked in groups to discuss. It was beautiful to observe! Best of all, there was wide disagreement. Most of the disagreement had to do with the way that we set up the models on the windowsill--the models that were closer to the window had much more condensation that the windows that did not.

Some other models had been bumped and had blue water droplets clinging to the sides. "When it evaporates, it should be clear, right?" one student asked. "So why is it blue?" This led to a discussion of a model that is so fragile that a slight bump can change the results. "If someone who didn't know about evaporation looked at it, they might think that the water evaporated blue!" a student said.

The task also required students to refer back to their resources about the water cycle. "Would there be transpiration in this model?" one student asked her group. "There wouldn't, right? Because there are no plants." In another group, peers corrected a student's misconception about groundwater. "The water on the bottom is the groundwater because it's on the ground," she said. Group members went back to the diagram to talk about why they thought the water represented surface water instead.

The writing prompt was a straightforward introduction to science argumentation, as I provided students with a claim that they could use as their topic sentence. Some students wanted to write more than a paragraph, while others stuck with a simple explanation. This will give me great information about where they are with science writing so that I can plan instruction from this point.

For a busy teacher, re-making existing activities to involve deeper levels of thinking is a great way to build from an existing curriculum. What activities have you improved upon?

You can find the writing prompt and activity in Watersheds, Wetlands, and Water Resources: Texts and Activities over at TpT.


*I like "curriculums" instead of "curricula" because I think it's fussy to apply Latin-based rules to modern words. It's an acceptable plural here.

Tuesday, April 21, 2015

Animal Adaptations Synthesis

    What kid doesn't love learning about animal adaptations? In this age of Wild Kratts and Nat Geo Wild, it seems as if students know more about animals than ever before. An animal adaptations unit is the perfect way build on this background knowledge and encourage students to consider topics more deeply. It is also the perfect springboard for overlapping cycles of inquiry.

Animals in the Classroom

    I've never had hamsters, gerbils, or other typical classroom pets. But the classroom is always filled with animals! We've had mealworms, crickets, visiting toads and salamanders, tadpoles, and of course the birds who visit our feeders.
    The different animals have appealed to different groups of students. One boy (who happened to sit near the window) took an especial interest in recording the numbers of birds that we saw. He learned to identify the common species and started giving lessons to other students. Over the course of the last few months, students have noticed that different birds prefer to feed in different places. "The chickadee and the tufted titmouse both come to the feeder, but the robins never do." 
    Just a few weeks ago a student brought in some wood frog eggs, which have hatched into tadpoles. Students noticed that the tadpoles stay still most of the time. "Are they dead? They're not moving," was a common comment of the first few days. 
    These experiences with watching and noticing were vital for our later talk about animal adaptations. Students began the formal lessons with their own firsthand experiences instead of just having secondhand experiences. These firsthand opportunities to observe and talk about animals in an informal way built a firm foundation for our later lessons.

Adaptations Lessons

    Several weeks ago I started more formal science lessons about animal adaptations. I started with a text that I wrote  few years ago, a text designed to get kids saying the word "adaptations" over and over again! 
    Then, students participated in a bird beaks demonstration activity. Using simple household materials, students tried out different model bird beaks. (Directions for this activity are easy to find; my set of full instructions with student pages is available here.) 
    During and after the activity, students mentioned birds that they knew: "This is like a cardinal," they said confidently at the sunflower seeds station. "Do any of our birds eat bugs in bark?" a student asked at the other station. (I loved the use of our birds!)
    Students also used an embedded presentation on my student blog to take notes about camouflage. I've gone back and forth about categorizing examples of camouflage. On the one hand, it seems like going into too much detail. On the other hand, giving students lots of examples and strong vocabulary really enhances their conversations later.
    Right away, students were applying the ideas from the formal lessons into their daily observations. "The tadpoles don't move, probably because they blend in with the bottom of the pond," one student said.
    Looking out the window, another student reflected, "The robin's beak is like a set of chopsticks! I just saw it get a worm!" 

Synthesis

    With all of these experiences, it became time to synthesize and put it all together! Students were asked to choose an animal and find information about its adaptations. 
    This wasn't a normal animal report--students were specifically looking for information about the animal's adaptations. Some students chose to look back to animals they have previously studied. "I did a report on the red panda in third grade, can I work on it again?" one student asked. Other students took the opportunity to research new and unusual creatures. I offered a coupon bounty to students who would agree to study invertebrates--hey, invertebrates need some love! 
    By this point in the year, students should be capable of conducting a simple Internet search and using the application of their choice to create a product. For the most part, things went smoothly. Questions came from students who needed some more help with crafting search terms or wondered how a feature helps an animal to survive. My hardest challenge? Keeping up as kids called my name from around the room--not for help, but because they wanted me to see the cool information they were finding. 
    It was nice to see the synthesis of content and process in this stage. We have come so far as a community that whenever there was a question of "How do I...?" multiple hands went up to help.  The conversations also centered firmly on the learning, as students were engaging with Internet resources to find adaptations that helped their creatures to survive. Yes, they loved it, but even more importantly, it was an activity that highlighted key learning for our grade level.

    Informal experiences can have a huge impact on more formal units. When working with animal adaptations, I saw that our work all year led to serious thinking about animal adaptations.
   And this is not bad for Day 5 of PSSA testing!

Tuesday, March 10, 2015

Where Science and Play Meet

    This year, as I've experimented with contracts, centers, and self-directed research, I've worked to find a balance between "covering" curriculum and exploratory learning. I don't think that these two approaches are mutually exclusive--in fact, I think that they can complement each other. Consider the story I've watched unfold.

Water Bead Crystals
    We experimented with water beads in the classroom a few months ago. Like many new items, they were popular for a time and then slowly faded away. I started drying them out and putting them away, until only one bead in a plastic cup was left.
     I thought that was the end of the water beads, and I've been trying to introduce other interesting items for experimentation and observation, like mealworms.

    But the story wasn't done. The bead in the plastic cup, sitting on the windowsill, was observed by two students who were trying to purify salt water. They started to wonder--could they make a climate for a water bead?
    Over the course of their experimentation, the bead changed. It became a crystal, but didn't shrink in size as the water beads usually do. For some reason, this got some kids very excited.

Crystal Research
    The students requested to have more water beads. One student even brought in some from home. Working together at recess, a new group of students emerged--students who hadn't worked together much before, but were interested in the crystal.
    They pulled together lots of resources from the room, using a box from the "Cool Cardboard Pieces" area, various recycled plastic containers, and other science items. We already had the microscopes out for mealworm observations, so students started looking at the water beads with the microscopes. They created multiple experiments in different places in the room. To the outside observer, their work would have looked a lot like play. They were completely committed to their work. I was listening in but not interacting except to get requested materials (or look in the microscope when they wanted to show me things).
    The teacher-ly part of me was wondering--what science lessons could be learned from the water bead? Were they looking for meaning in a place where they would not find it?

Moving to a Curricular Lesson
    During arrival time, students continued with their work until it was time for our regular science class. I was teaching one of my favorite lessons (decomposers! Awesome!) in which we set up a mold experiment. This is an experiment that we do as a whole class, and I have scaffolded it so that students have to fill in the names of the experiment parts (testable question, hypothesis, procedures). We set up our mold experiment and talked about what we thought would happen.

Regular Curriculum Impacting the Experimentation
    Without any prompting from me, the science lesson changed the water bead play. In the next work session (students from two different classes, choosing to stay in at recess), suddenly words like "hypothesis" were floating around. "We didn't make a testable question!" one student said, and the talk turned to what their testable question was. At library class, several students checked out books about crystals.
    Now there are several containers of water beads in different locations, with students sharing their hypotheses and testable questions. The core group of students doing the investigations have talked with others about their work during transition times and dismissal.

Play, Science, and the Regular Curriculum
    I was so interested to see the words from the science lesson move into the water bead play. It clearly showed how standard lessons can enrich student-led experimentation. In this case, students had a rich context that worked perfectly with the words from the lesson.
    At first I thought it was lucky that this happened at the right time. But luck has nothing to do with it! Building a classroom culture of collaboration and experimentation will lead to these moments.

So the questions that I am thinking about:
-How does play impact science learning for older elementary students?
-How can I strengthen ties between play/experimentation and the regular curriculum?


Monday, September 15, 2014

Science and Writing: A Natural Pair

Teaching science goes so well with teaching writing! Kids naturally enjoy learning about science. When they learn, they want to write...and they have to grapple with the best ways to express their ideas. Writing instruction blossoms from science activities.

But it's not always so simple, of course. It does take some planning, some preparation, and a big dash of serendipity to get the most out of the connections between science and writing.

Planning
We love visiting nearby parks and poking about
in streams together!

The planning may not always be what teachers typically think of as planning. It's not always writing essential questions in little boxes! Squeezing the most learning out of teachable moments requires a broad knowledge of both science and writing standards. In addition, I try to learn as much as I can about the background details of what I am teaching.

So I take every chance to learn about geology, animal adaptations, day/night, and seasonal changes...I know that I may have to draw on this knowledge to guide student investigations. Following scientists and museums on Twitter is an easy way to build my background knowledge. Luckily my kids like "adventuring" so we all learn together.

Informal activities
Science writing starts with the informal activities that I have in the classroom. Toads, crickets, and praying mantises are all highly motivating for students, and a great way to get kids writing. We draw pictures, add labels, and take notes.

In third and fourth grades, students have trouble generating data tables independently, so this is a task that I take on at first. I like to have a Bird Observation binder for students to record what we see at the window. When students take notes, other students sometimes ask questions: "What were they doing? How many did you see?" These are the kinds of questions that scientists as writers need to answer!


Trays set up for our litmus paper experiment.
Even a task as mundane as lunch count can be the beginning of science writing. I have a student keeping track of our menu items and # buying and packing each day. Today he came to show me an interesting anomaly in the data. Little does he know that this data will be used next week when we talk about drawing conclusions!


Formal activities
Scientists also need opportunities for formal writing. One thing that I have learned is that students thrive on real experiences and clear prompts. Last week, while learning about classification, students classified liquids as acids or not acids, using litmus paper as an indicator.

Because it is so early in the year, I offered students a writing prompt with a writing frame. In the prompt, students take on the role of science teacher and write to their principal regarding the importance of litmus paper. (Requesting supplies is a fairly common writing task for
scientists, of course!) The writing frame helps students to see the kind of formal writing and sentence structure used in this kind of science writing. Students also enjoyed signing their names as "Mr." or "Miss" at the end.

In future writing prompts, students will take on varying roles. We do these prompts about once a month, and they always relate directly to activities we have done in class. Engaging real life experiences enrich student writing. Students elaborate more and use richer vocabulary when they are writing about class experiences.

Advance planning, informal experiences, and formal writing opportunities help students to see the natural connections between science and writing.


News and Notes
-A new version of November Reading Homework is now available. Revised file numbers, minor formatting updates, and an end of month assessment are available.
-In my classroom this week, I'm using character traits materials from Character Traits and Emotions along with stories from Teaching About Theme.
-Check out the great tutorials on Frolyc! Frolyc is a way to publish activities to student iPads. Many of my texts are available. You can hear me explain how to build these activities on the YouTube playlist.

Tuesday, April 29, 2014

A classroom bird feeder

I can't believe that it took me this long to get a bird feeder for my classroom! In just a few short months, I've seen how this one little tool engages and motivates students. (Thanks to Cornell Birds for the bird feeder!)

Our school is located near an oak forest and an orchard, so we are in a perfect spot. At first, juncoes were our main birds. Now, we have seen chickadees, cardinals, tufted titmice, house finches, mourning doves, and English sparrows.
The tufted titmouse is a frequent visitor


Long-term observations
Students have been able to engage in long-term investigations with the bird feeder. As they have looked at the data over time, students have come up with some generalizations. "We see more birds on rainy days than on sunny days," one student said. Another said, "We haven't seen the juncoes in awhile. They must be winter birds." I made an observation binder to keep track of what we see. It will be interesting to compare data across the years to see what changes we can notice.
A page in the observation binder

Attentional switching
Is the bird feeder too distracting? I know that I sometimes stop mid-sentence and say, "Hm, the chickadee is here right now." However, I've learned that practice in switching attention back and forth can really help students to focus. (I wrote more about this in my book, The Forest and the Trees: Helping Readers Identify Important Details in Texts and Tests.) Being able to look up at the bird feeder, see what is there, and then focus back on the task at hand is important for students.

During state testing, kids did ask me to shut the blinds. :)
The cardinals in February

Using resources
Kids use many different kinds of resources to identify the birds. I have put up the Ned Smith posters of Pennsylvania birds and animals, which are a handy resource. (I started out by using them to decorate the walls during state testing, and then left them up.) I also have several bird books on the windowsill. Students have gone from saying "What is that black bird?" to asking "Is that a starling or a crow?"

But students, like people in general, like to learn through social interaction. Students share what they know and quickly tell students from other homerooms what the different birds look like. "Oh, the brown one with the orange beak is the female cardinal!" Several of them have become more interested in birds in general, and now are observing birds at home as well as at school. They compare stories when they come in and ask more questions: "Mrs. Kissner, do kestrels live around here?" or "___ said he saw a peregrine falcon. Do you think that can be true?"

Sharing information
One day a student brought in a camera from home to take photographs of the birds. The student shared the camera throughout the day and the students took turns trying to capture the best images of as many different birds as they could see. They scrolled back through the image file and compared their pictures: "That one is the best one of the junco," and "I never noticed that the tufted titmouse had that orange part!"

The bird feeder is such a focal point, as a matter of fact, that I trudged out in heels in the rain to fill it up with sunflower seeds this afternoon. This delighted my students, who watched and waved from inside, and then gushed about the amazing new bird they saw at the feeder. (I'm glad they didn't take a picture of this.)